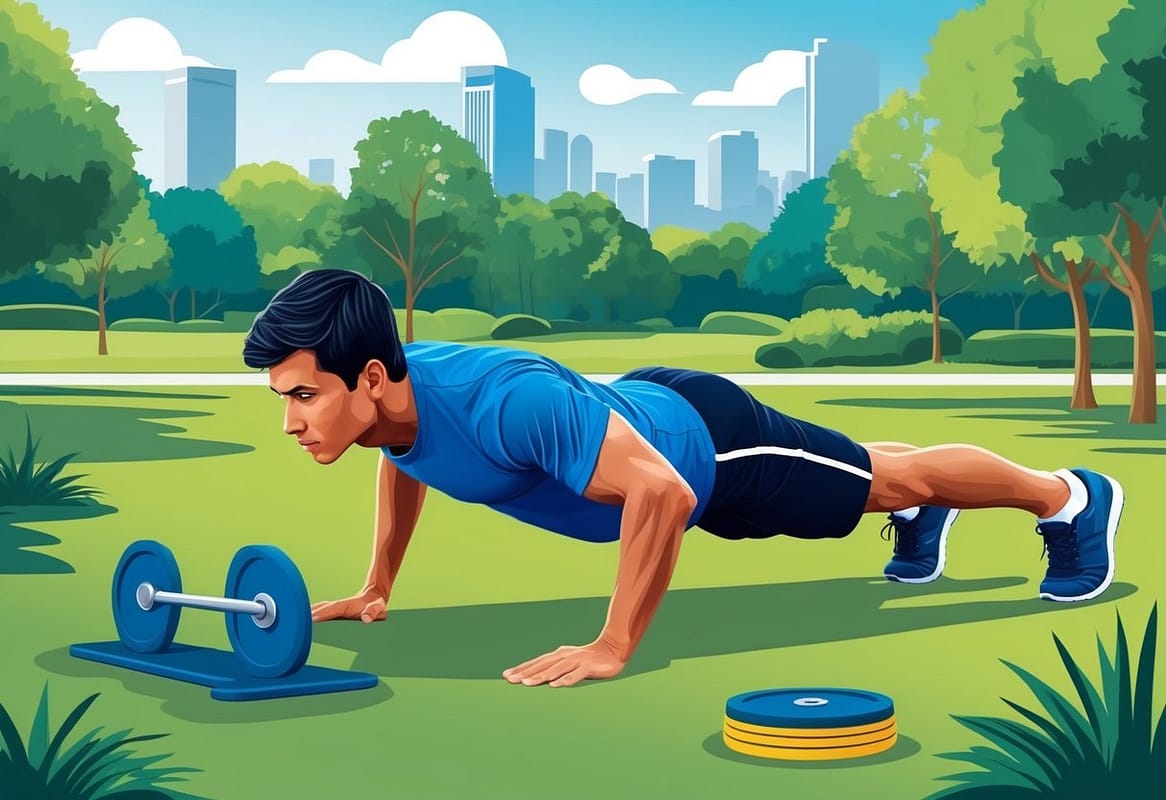
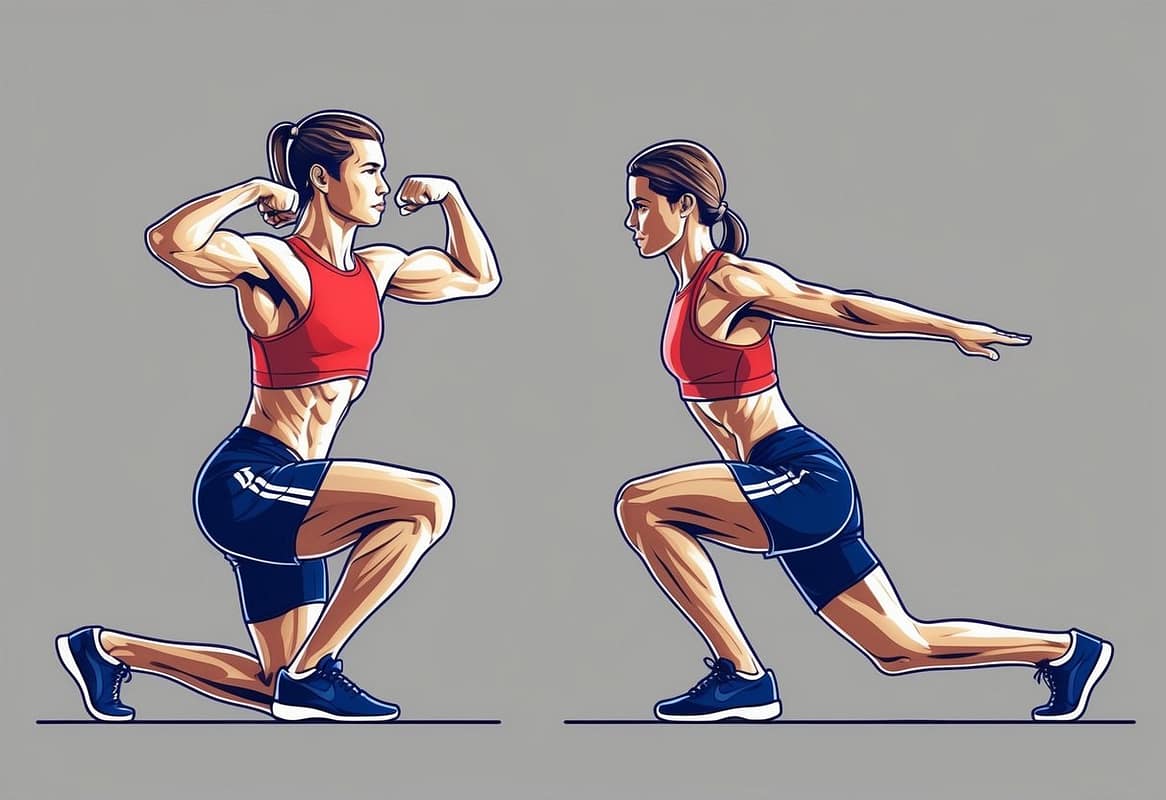
Calisthenics offers a powerful approach to fitness. It uses only your body weight to build strength, flexibility, and endurance. This training method has gained popularity for its simplicity and effectiveness.

Mastering calisthenics can transform your physique and boost your overall health. By focusing on fundamental movements like push-ups, pull-ups, and squats, you’ll develop functional strength that translates to real-world activities. Plus, these exercises can help combat obesity and improve your body composition.
Key Takeaways
- Calisthenics uses bodyweight exercises to build strength and muscle.
- You can perform calisthenics workouts anywhere, without special equipment.
- Regular practice of calisthenics exercises can improve overall fitness and body composition.
What Are Body Weight Exercises?

Body weight exercises use your own mass as resistance to build strength, flexibility, and endurance. You can do these workouts anywhere without special equipment. Push-ups, pull-ups, squats, lunges, planks, and jumping jacks are popular examples.
Popular Posts
- Massage Gun vs. Foam Roller: Which Recovery Tool Reigns Supreme?
- 27 Best Calisthenics Exercises for Full-Body Strength and Fitness
- 10 HIIT Workouts for Busy Professionals: Max Fitness, Min Time
- Calisthenics and Small Legs: The Truth Behind Bodyweight Training and Muscle Development
- The Best Crossfit Exercises for Full-Body Conditioning
These exercises focus on natural movements that engage multiple muscle groups at once. By practicing body weight exercises, you can improve your overall physical fitness through functional movements that enhance mobility and flexibility.
Can You Build Muscle with Bodyweight Exercises?

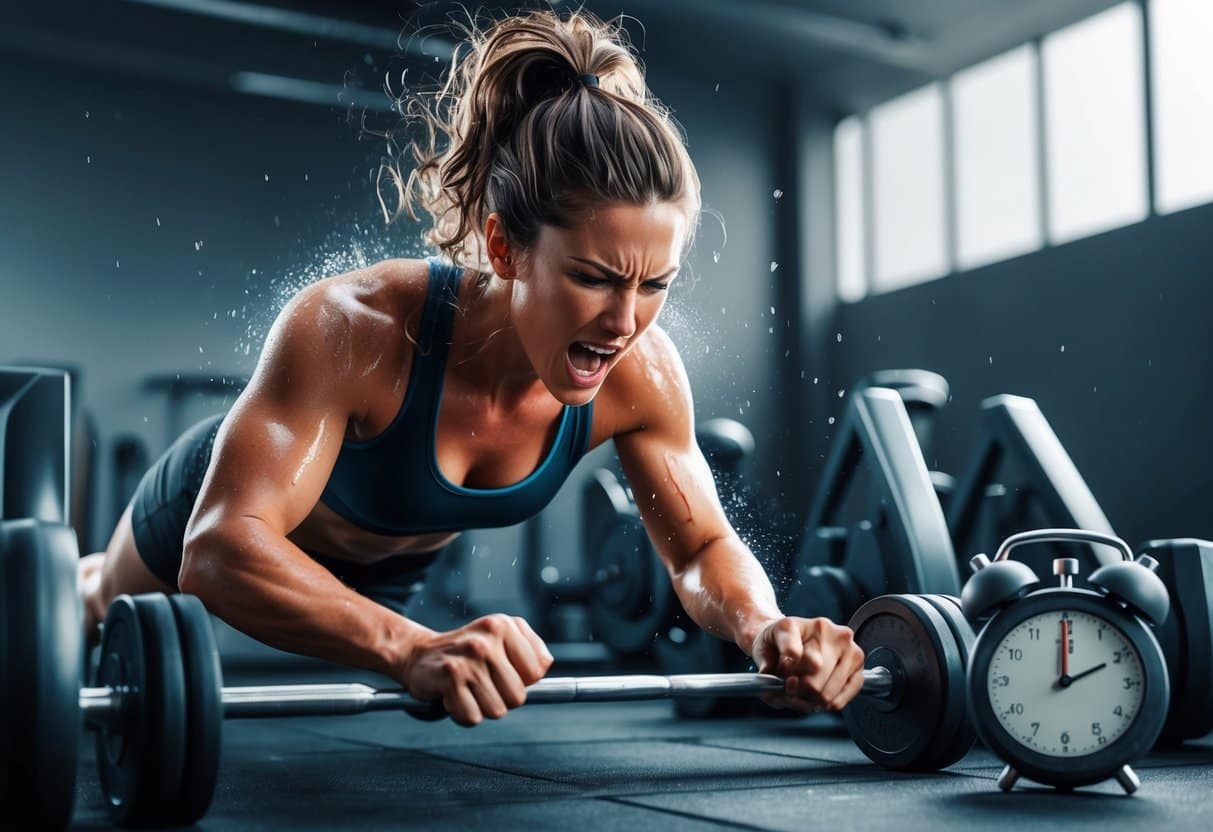
Calisthenics can effectively build muscle mass and strength. Your body responds to resistance, whether from weights or your own body. By manipulating leverage, angles, and movement patterns, you create tension that stimulates muscle growth.
Bodyweight exercises engage multiple muscle groups simultaneously, promoting functional strength and coordination. As you progress, you can increase difficulty by adjusting your body position or adding more complex variations.
Benefits of calisthenics include improved body control, flexibility, and balance. You’ll develop lean, functional muscle that translates well to real-world activities. Plus, you can workout anywhere without equipment.
- Focus on compound movements
- Increase time under tension
- Perform exercises to failure
- Progressively overload by adding reps or harder variations
- Allow adequate rest between workouts
26 Essential Calisthenics Exercises for Maximum Results
Chest Exercises
Training the chest is crucial in calisthenics for building upper body strength, enhancing functional fitness, and improving overall physique. Strong chest muscles support various movements, from push-ups to dips. They also contribute to better posture and shoulder stability.
Incorporating chest exercises into your routine not only boosts muscle definition but also aids in performing advanced calisthenics moves. Prioritize chest training to achieve balanced strength. Optimize your fitness journey with a well-rounded approach.
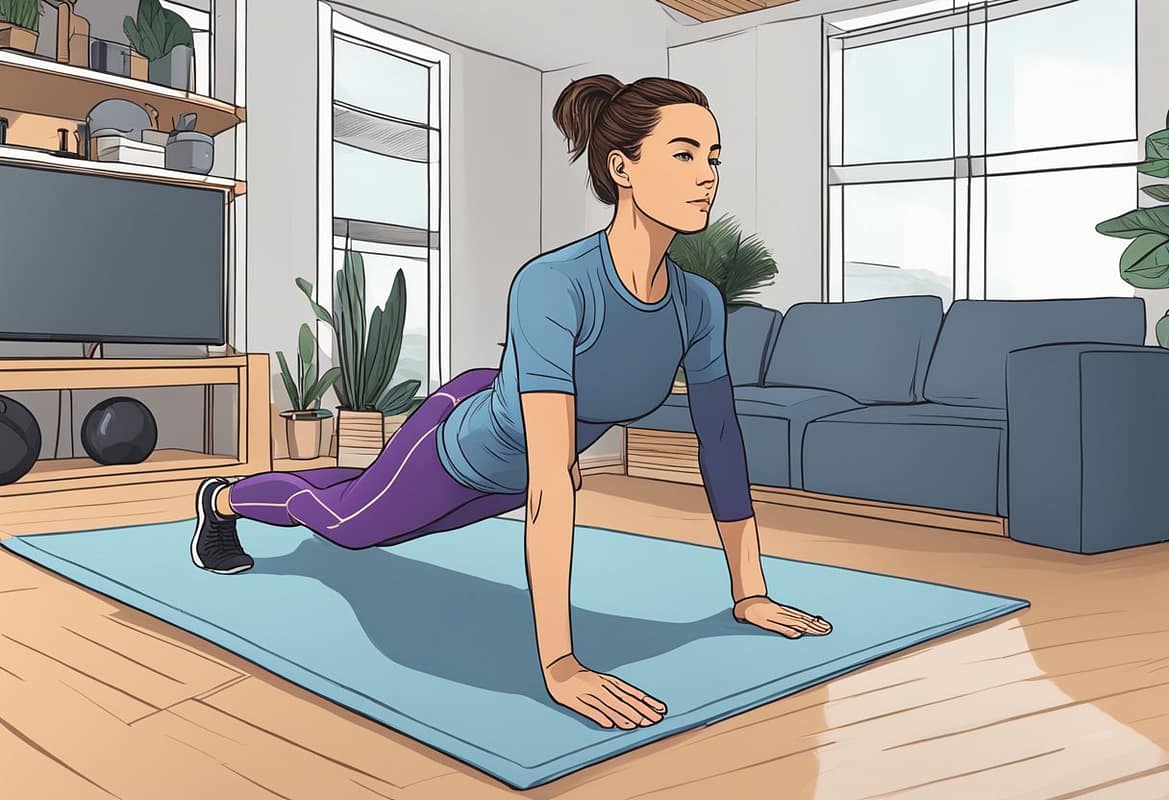
1. Push-Up
The push-up is a fundamental exercise for building upper body strength and enhancing core stability. This movement primarily targets your chest, shoulders, and triceps while also engaging your core.
To perform a push-up:
- Start in a high plank position with your hands placed slightly wider than shoulder-width apart.
- Keep your body in a straight line from head to heels.
- Lower your body until your chest nearly touches the floor, keeping your elbows at a 45-degree angle.
- Push yourself back up to the starting position by straightening your arms.
Benefits:
- Strengthens chest, shoulders, and triceps
- Enhances core stability
- Improves overall upper body muscle definition
Common mistakes include letting the hips sag and flaring the elbows out too wide. To avoid this, keep your core engaged and maintain a straight line from head to heels throughout the movement.
If you’re new to push-ups, start with knee push-ups or incline push-ups using an elevated surface. Aim for 10 controlled reps before progressing to standard push-ups.
For optimal results, perform 3 sets of 10-15 repetitions, adjusting based on your fitness level.
2. Straight Bar Dip
The straight bar dip is a powerful exercise for building upper body strength and improving shoulder stability. This movement primarily targets your chest, triceps, and shoulders.
To perform a straight bar dip:
- Find a sturdy straight bar at waist height.
- Grip the bar with both hands, palms facing down, and lift yourself up to a support position with arms straight.
- Lean slightly forward to engage your chest muscles.
- Lower your body by bending your elbows until your shoulders are below your elbows.
- Push yourself back up to the starting position by straightening your arms.
Benefits:
- Strengthens chest, triceps, and shoulders
- Improves shoulder stability
- Enhances upper body muscle definition
Common mistakes include flaring the elbows out too wide and not leaning forward enough. To avoid this, keep your elbows close to your body and maintain a slight forward lean throughout the movement.
If you’re new to straight bar dips, start with parallel bar dips or assisted dips using resistance bands. Aim for 5 controlled reps before progressing to unassisted straight bar dips.
3. Forward Lean Push-Up
The Forward Lean Push-Up is a challenging variation that targets your upper body and core muscles. This exercise shifts your hands closer to your waist, increasing the difficulty and emphasizing different muscle groups.
Benefits:
- Builds strength for advanced movements like handstand push-ups
- Enhances pushing power in the lower chest and upper abdominal area
- Improves core stability and balance
Step-by-Step Instructions:
- Start in a standard push-up position
- Shift your body forward, moving your hands closer to your waist
- Lower your chest towards the ground, keeping your body straight
- Push back up to the starting position
- Repeat for the desired number of repetitions
Common Mistakes:
- Sagging hips or arched back
- Not maintaining a straight body line
- Moving hands too far forward too quickly
Safety Tips:
- Progress gradually to avoid strain
- Keep your core engaged throughout the movement
- Stop if you feel any shoulder or wrist discomfort
Recommended Sets and Repetitions:
- Beginners: 3 sets of 5-8 repetitions
- Intermediate: 4 sets of 8-12 repetitions
- Advanced: 5 sets of 12-15 repetitions
As you progress, aim to move your hands closer to your waist. This exercise can help you work towards more advanced movements like diamond push-ups and planche variations.
4. Diamond Push-Up
Diamond push-ups target your chest, triceps, and shoulders. They require no equipment and can be done anywhere.
Benefits:
- Strengthens chest muscles
- Builds triceps
- Improves core stability
- Enhances upper body definition
Step-by-Step Instructions:
- Start in a plank position
- Form a diamond shape with your hands under your chest
- Lower your body until your chest touches your hands
- Push back up to the starting position
- Repeat
Common Mistakes:
- Letting hips sag
- Not keeping elbows close to the body
- Incomplete range of motion
Safety Tips:
- Maintain a straight back throughout the movement
- Keep your core engaged
- Stop if you feel pain in your shoulders or wrists
Recommended Sets and Repetitions:
- Beginners: 3 sets of 5-8 reps
- Intermediate: 3 sets of 10-15 reps
- Advanced: 4 sets of 15-20 reps
Adjust the number of repetitions based on your fitness level. Progress gradually to avoid injury and build strength over time.
Building Your Back with Calisthenics
Training the back is essential in calisthenics for developing upper body strength, improving posture, and enhancing overall fitness. A strong back supports various movements, from pull-ups to rows. It also helps prevent injuries by stabilizing the spine and shoulders.
Incorporating back exercises into your routine not only increases muscle definition but also aids in performing advanced calisthenics moves. Prioritize back training to achieve balanced strength. Optimize your fitness journey with a comprehensive approach.
5. Horizontal Rows – For Pulling Power
Horizontal rows are an excellent exercise for building upper body strength and improving posture. This movement primarily targets your upper back and biceps while also engaging your core.
To perform horizontal rows:
- Set up a bar at waist height or use a pair of rings or TRX straps.
- Lie underneath the bar and grab it with an overhand grip, hands shoulder-width apart.
- Extend your legs out in front of you and keep your body in a straight line.
- Pull your chest towards the bar, squeezing your shoulder blades together.
- Lower yourself back down with control.
Benefits:
- Strengthens upper back and biceps
- Improves posture
- Enhances core stability
Common mistakes include letting the hips sag and using momentum to pull up. To avoid this, keep your core engaged and focus on slow, controlled movements.
If you’re new to horizontal rows, start with the bar or straps set higher to make the exercise easier. Aim for 10 controlled reps before lowering the bar or straps to increase difficulty.
For optimal results, perform 3 sets of 8-12 repetitions, adjusting based on your fitness level.
6. Mastering the Chin-Up
The chin-up is a fundamental exercise for building upper body strength and improving grip endurance. This movement primarily targets your biceps and upper back while also engaging your entire core.
To perform a chin-up:
- Hang from a pull-up bar with an underhand grip, palms facing you, and hands shoulder-width apart.
- Keep your arms straight and shoulders engaged.
- Pull your body up until your chin is above the bar.
- Lower yourself back down with control.
Benefits:
- Strengthens biceps and upper back
- Improves grip strength
- Enhances core stability
Common mistakes include using momentum and not fully extending the arms at the bottom of the movement. To avoid this, focus on slow, controlled repetitions and ensure a full range of motion.
If you’re new to chin-ups, start with assisted chin-ups using a resistance band or an assisted pull-up machine. Aim for 5 controlled reps before progressing to unassisted chin-ups.
For optimal results, perform 3 sets of 5-10 repetitions, adjusting based on your fitness level.
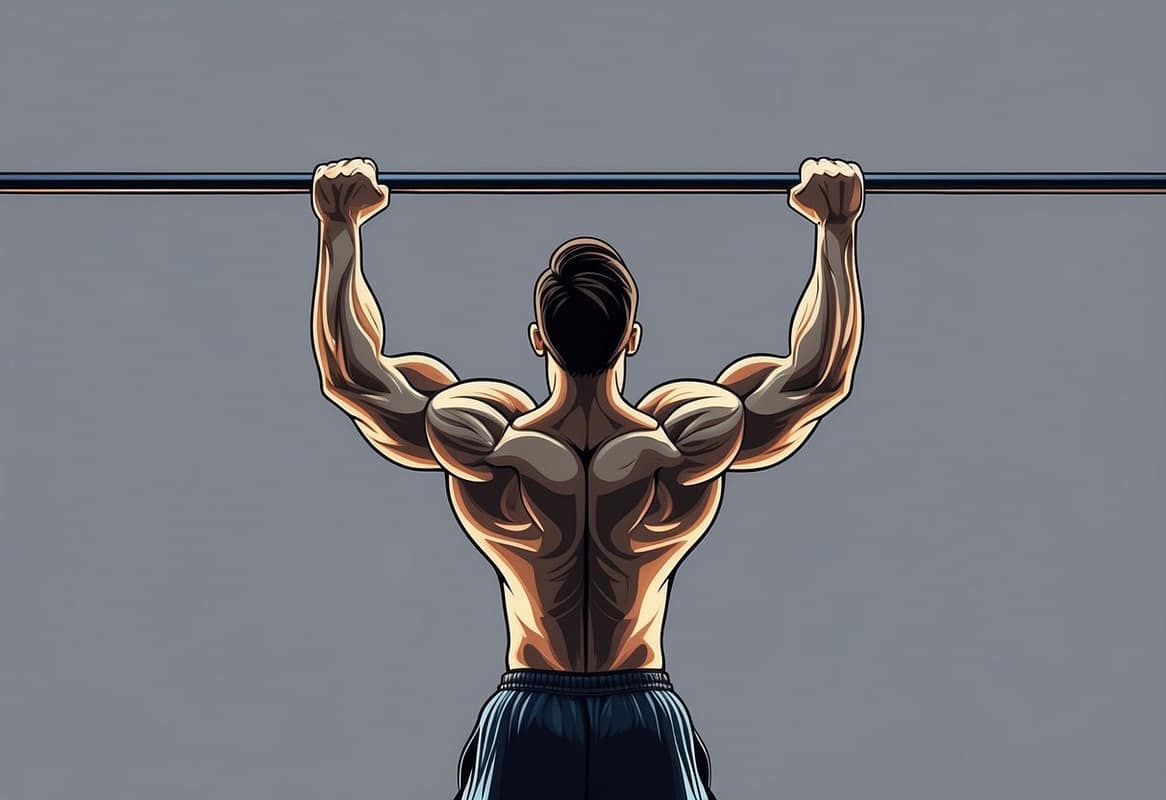
7. Pull-Up
The pull-up is a fundamental upper body exercise that strengthens your back, biceps, and shoulders. It’s crucial for developing overall pulling strength in calisthenics.
Benefits:
- Builds upper body strength
- Improves grip strength
- Enhances core stability
- Increases overall body awareness
Step-by-Step Instructions:
- Hang from a bar with palms facing away
- Engage your core and squeeze your shoulder blades
- Pull yourself up until your chin clears the bar
- Lower yourself slowly back to the starting position
Common Mistakes:
- Using momentum to swing up
- Not fully extending arms at the bottom
- Failing to engage the core
Safety Tips:
- Start with assisted pull-ups if needed
- Use proper form to avoid injury
- Don’t overexert yourself
Recommended Sets and Repetitions:
- Beginners: 3 sets of 5-8 reps
- Intermediate: 4 sets of 8-12 reps
- Advanced: 5 sets of 12-15 reps
To progress, focus on mastering scapular control and negative pull-ups. Aim for at least 12 consecutive reps before moving to more advanced variations.
8. Fast-Paced Vertical Pull
The Fast-Paced Vertical Pull builds on the standard pull-up, focusing on speed and power. This exercise enhances explosive strength, crucial for advanced calisthenics moves.
To begin, use a resistance band for proper form. Hang from the bar with arms fully extended. Pull yourself up as quickly as possible, aiming to reach the bar in one swift motion. Lower yourself slowly and repeat.
Benefits include increased upper body power, improved muscle recruitment, and better performance in dynamic movements.
Step-by-Step:
- Grab the bar with an overhand grip
- Hang with arms fully extended
- Explosively pull yourself up
- Briefly pause at the top
- Lower yourself slowly
- Repeat
Common mistakes:
- Using momentum instead of muscle power
- Not fully extending arms between reps
- Neglecting proper form for speed
Safety tips:
- Warm up thoroughly before attempting
- Start with lighter resistance bands
- Progress gradually to avoid injury
Aim for 3-5 sets of 5-8 repetitions. Focus on quality over quantity. As you improve, reduce band assistance and eventually add weight for continued progress.
Remember, speed is key. Your goal is to pull up faster, not higher. This exercise differs from high pull-ups, which emphasize height over velocity. Master this move to pave the way for more advanced techniques in your calisthenics journey.
9. Mastering the Muscle-Up
The muscle-up stands as a pinnacle achievement in bodyweight training. This move combines an explosive pull-up with a swift transition to a dip, requiring significant upper body strength and coordination.
To prepare, focus on perfecting your straight bar dips and explosive pull-ups. Begin by practicing the swing to generate momentum, using tucked pulls as a valuable preparatory exercise.
Incorporate resistance band assistance to build muscle-up specific strength. Aim for 5 repetitions at each band level, gradually reducing assistance as you progress. Complement this with negative muscle-ups and jumping variations to develop the necessary power and technique.
Benefits:
- Builds exceptional upper body strength
- Enhances core stability and control
- Improves coordination and body awareness
Safety tips:
- Warm up thoroughly before attempting
- Use proper equipment and ensure a secure grip
- Progress gradually to avoid injury
As you advance, explore ring muscle-ups, strict form variations, or add weight for an extra challenge. With consistent practice, you’ll master this impressive display of strength and skill.
10. Front Lever
The Front Lever showcases exceptional pulling strength and is a crucial skill in advanced calisthenics. This challenging move requires dedication and proper preparation to master safely.
Begin with Tucked Front Lever holds and band-assisted variations to develop straight arm pulling power and correct form. Incorporate Tucked and Advanced Tucked Front Lever Raises, Dragon Flag bottom holds, and weighted Pull-Ups into your routine to build the necessary strength foundation.
To perform the Front Lever:
- Hang from a bar with straight arms
- Pull your body up while keeping arms straight
- Extend your legs forward, forming a straight line from toes to shoulders
- Hold the position, maintaining body tension
Common errors include:
- Bending arms
- Arching the back
- Failing to maintain a straight body line
Safety tips:
- Progress gradually
- Warm up thoroughly
- Listen to your body and avoid overtraining
Recommended training:
- 3-5 sets of 5-10 second holds
- 2-3 times per week
11. Back Lever
The Back Lever is an impressive calisthenics skill that showcases strength and control. It targets your core, back, and shoulders while requiring excellent mobility. To achieve this move, start with the Tucked Back Lever. Aim for a 20-second hold and practice Tucked Back Lever Raises to build shoulder strength.
Progress to the advanced Tucked Back Lever before moving on to single leg, straddle, and full Back Lever variations. For each stage, combine holds with pulses and negatives. Strive for a 10-second hold before advancing to the next level.
Benefits:
- Builds core and lower back strength
- Improves shoulder stability
- Enhances body control and awareness
Common mistakes:
- Bent arms
- Arched back
- Insufficient warm-up
Safety tips:
- Warm up thoroughly
- Progress gradually
- Listen to your body and avoid overtraining
Recommended practice:
- 3 sets of 5-10 second holds, 3 times per week
Shoulder Exercises
Training the shoulders is vital in calisthenics for building upper body strength, improving stability, and enhancing overall athletic performance. Strong shoulders support a wide range of movements, from push-ups to handstands. They also help prevent injuries by stabilizing the shoulder joints.
Incorporating shoulder exercises into your routine not only boosts muscle definition but also aids in performing advanced calisthenics moves. Prioritize shoulder training to achieve balanced strength. Optimize your fitness journey with a well-rounded approach.
12. Pike Push-Up
Pike push-ups are a fundamental calisthenic exercise that target your shoulders and upper body. This movement serves as a stepping stone towards more advanced exercises like handstand push-ups and muscle-ups.
Benefits:
- Strengthens shoulders and upper chest
- Improves core stability
- Enhances body control and balance
Step-by-Step Instructions:
- Start in a downward dog position
- Lower your head towards the ground
- Push back up to the starting position
Common Mistakes:
- Rounding the back
- Not lowering far enough
- Flaring elbows outward
Safety Tips:
- Keep your core engaged throughout the movement
- Maintain a straight line from hands to hips
- Progress gradually to avoid injury
Recommended Sets and Repetitions:
For beginners, start with 3 sets of 5-8 repetitions. Aim to reach 3 sets of 10 before progressing.
Start with half pike push-ups or negative variations. As you build strength, increase the difficulty by elevating your feet or performing deeper repetitions. Consistent practice will help you unlock more advanced calisthenic movements and improve your overall upper body strength.
13. Wall-Supported Inverted Push-Up
This advanced exercise builds incredible upper body and core strength. It’s a crucial step towards achieving a freestanding handstand push-up.
Benefits:
- Develops shoulder, chest, and tricep muscles
- Improves balance and body control
- Enhances core stability
Step-by-Step Instructions:
- Face a wall and place your hands shoulder-width apart about 6 inches from it
- Kick up into a handstand position with your heels touching the wall
- Lower your head towards the ground by bending your elbows
- Push back up to the starting position
Common Mistakes:
- Arching the back
- Not maintaining a straight body line
- Rushing the movement
Safety Tips:
- Use a spotter when first attempting this exercise
- Ensure you have mastered pike push-ups before progressing
- Always warm up your wrists and shoulders beforehand
Recommended Sets and Repetitions:
Start with 2-3 sets of 3-5 repetitions, gradually increasing as you build strength. Aim for 6 full-range repetitions before progressing to belly-to-wall variations.
14. Standing on Your Hands
Learning to stand on your hands is an achievable goal for most people. With consistent practice, you can master this skill in about three weeks.
Start by perfecting a 30-second wall handstand before attempting freestanding versions.
Practice falling safely to build confidence. Once comfortable, focus on consistency and regular practice. Aim for daily 20-minute sessions to see rapid improvement.
To begin:
- Place hands shoulder-width apart
- Kick up against a wall
- Hold for 30 seconds
- Gradually move away from the wall
Common errors include arching the back or letting legs separate. Keep your core tight and legs together for better control.
Safety tip: Practice on a soft surface like grass or mats.
Recommended practice: 5-10 attempts daily, holding each for as long as possible.
For advanced practitioners, try high bar handstands or work towards single-arm variations.
15. Freestanding Handstand Push-Up
The freestanding handstand push-up is a pinnacle of bodyweight strength and control. This advanced exercise combines balance, stability, and upper body power.
Benefits:
- Builds exceptional shoulder and arm strength
- Enhances core stability and balance
- Improves proprioception and body awareness
Prerequisites:
Before attempting this move, you should:
- Hold a freestanding handstand for 30 seconds
- Master wall handstand push-ups
Step-by-Step Instructions:
- Begin in a freestanding handstand
- Lower your body by bending your elbows
- Push back up to the starting position
Progression:
- Start with small pulses (aim for 6 reps)
- Practice negative handstand push-ups
- Gradually increase depth to 90-degree elbow bend
- Work towards full range of motion
Common Mistakes:
- Losing balance during the movement
- Insufficient shoulder strength
- Improper hand placement
Safety Tips:
- Practice on soft surfaces
- Use a spotter when learning
- Build strength gradually
Recommended Sets and Repetitions:
- Beginners: 3 sets of 3-5 reps
- Advanced: 3-5 sets of 5-8 reps
16. Human Flag: Mastering the Horizontal Body Hold
The horizontal body hold challenges athletes to suspend their entire body parallel to the ground while gripping a vertical surface. This impressive feat engages multiple muscle groups simultaneously, making it a highly effective full-body exercise.
To begin your journey towards achieving this skill, start with side planks to build core strength and improve shoulder stability.
Progress to vertical holds, where you climb a ladder or pole and maintain an upright position. This helps develop the necessary pushing and pulling strength.
As you advance, practice hanging presses to further enhance your upper body power.
The vertical up hold is a crucial milestone—climb to the top of your support and hold your body vertically. From here, you can progress through various stages: tucked position, single-leg extension, straddle, and finally, the full horizontal hold.
Benefits include increased upper body and core strength, improved balance, and enhanced body awareness.
Always prioritize safety by using proper form, progressing gradually, and having a spotter nearby when attempting advanced variations.
Arm Exercises
Training the arms is crucial in calisthenics for building upper body strength, enhancing grip, and improving overall fitness. Strong arms support various movements, from pull-ups to dips. They also contribute to better performance in both basic and advanced exercises.
Incorporating arm exercises into your routine not only boosts muscle definition but also aids in performing advanced calisthenics moves. Prioritize arm training to achieve balanced strength. Optimize your fitness journey with a comprehensive approach.
17. Mastering the Parallel Bar Dip
Parallel bar dips are a powerful upper body exercise targeting your triceps, chest, and shoulders.
Begin with band-assisted dips to learn proper form and build strength. Aim for 10 quality reps before progressing to bodyweight dips.
To perform a dip:
- Grip parallel bars with straight arms
- Lower your body by bending your elbows
- Push back up to the starting position
Focus on maintaining a slight forward lean and keeping your elbows close to your body.
Avoid swinging or using momentum.
Start with 3 sets of 5-8 reps, gradually increasing as you improve.
Once you can perform 15 bodyweight dips, consider adding weight to further challenge your muscles and boost strength gains.
18. Crow Balance
The crow balance is a fundamental skill for mastering more advanced bodyweight exercises. This pose strengthens your wrists, improves balance, and engages core muscles.
Start with crow taps to build wrist strength and comfort.
Place your hands shoulder-width apart, bend your knees, and lean forward.
Tap your toes off the ground briefly, then return them. Repeat this motion to prepare your wrists.
To perform a full crow balance:
- Start in a squat position with hands flat on the floor
- Lean forward, shifting weight onto your hands
- Lift your feet off the ground, balancing on your hands
- Keep your arms slightly bent, core engaged
Common mistakes include placing hands too close together or letting elbows flare out.
Focus on keeping a solid base with your hands and tucking your knees close to your armpits.
For safety, practice on a soft surface.
Build up to holding the pose for 45 seconds before progressing to more advanced variations.
Aim for 3-5 sets of 10-30 second holds, depending on your skill level.
19. Mastering the Skin the Cat
The Skin the Cat exercise is essential for calisthenics beginners. This movement enhances shoulder mobility, builds core strength, and improves grip power.
It’s a fundamental skill that paves the way for advanced techniques like Front and Back Levers.
To perform a Skin the Cat:
- Hang from a bar with an overhand grip
- Raise your legs, tucking your knees to your chest
- Continue the rotation, bringing your feet over your head
- Lower your legs behind you, arching your back
- Reverse the movement to return to the starting position
Start with a lower bar and partial rotations if you’re new to this exercise.
As you progress, move to a higher bar and perform full rotations.
Initially, you may bend your arms for support. Aim to execute the move with straight arms and full body control as you improve.
Common mistakes include swinging excessively and rushing the movement.
Focus on slow, controlled rotations to maximize benefits and reduce injury risk.
Begin with 2-3 sets of 3-5 repetitions, increasing gradually as your strength and flexibility improve.
Lower Body
Training the lower body is essential in calisthenics for building leg strength, enhancing balance, and improving overall fitness. Strong legs support various movements, from squats to lunges. They also contribute to better performance in both basic and advanced exercises.
Adding lower body exercises to your routine not only boosts muscle definition but also aids in performing advanced calisthenics moves. Prioritize lower body training to achieve balanced strength. Optimize your fitness journey with a comprehensive approach.
20. Mastering the Basic Squat
The basic squat is a cornerstone exercise for developing lower body strength. This fundamental movement targets your quadriceps, hamstrings, and glutes, while also engaging your core.
To perform a basic squat:
- Stand with feet shoulder-width apart
- Lower your body as if sitting back into a chair
- Keep your chest up and weight on your heels
- Push through your feet to return to standing
Common mistakes include:
- Knees caving inward
- Rounding the back
- Not squatting deep enough
For safety, maintain proper form and avoid overexertion. If you struggle with balance, try holding onto a stable support.
Start with 3 sets of 10-15 repetitions.
As you build strength, progress to deeper squats or more challenging variations like lunges or glute bridges.
21. Pistol Squat: One-Legged Deep Squat
The one-legged deep squat is an advanced exercise that challenges your strength, balance, and flexibility. This unilateral movement targets your legs individually, potentially doubling your training intensity.
To begin, start with assisted variations using a bar or resistance band.
Progress to elevated versions before attempting the full bodyweight exercise. Aim for 8 repetitions of each progression before moving to the next level.
Benefits:
- Enhances balance and coordination
- Improves hip and ankle mobility
- Increases leg flexibility
- Targets muscles unilaterally
Step-by-Step Instructions:
- Stand on one leg, extending the other in front of you
- Lower your body by bending your standing leg
- Keep your chest up and arms out for balance
- Descend until your buttocks nearly touch your heel
- Push through your foot to return to the starting position
Common Mistakes:
- Letting your knee cave inward
- Rounding your back
- Failing to maintain balance
Safety Tips:
- Start with assisted versions to build strength safely
- Ensure proper form before progressing
- Use a spotter or practice near a wall for support
Recommended Sets and Repetitions:
- Beginners: 2-3 sets of 5-8 reps per leg
- Advanced: 3-4 sets of 8-12 reps per leg
Challenge yourself with weighted or balance variations once you’ve mastered the bodyweight version.
22. Bulgarian Split Squats
Bulgarian split squats are a challenging unilateral leg exercise that targets multiple muscle groups.
This move enhances balance, stability, and lower body strength.
Benefits:
- Improves leg strength and muscle definition
- Enhances balance and core stability
- Corrects muscle imbalances between legs
- Increases hip mobility and flexibility
Step-by-Step Instructions:
- Stand about 2 feet in front of a bench or raised platform
- Place your back foot on the bench, laces down
- Keep your front foot flat on the ground
- Lower your body until your front thigh is parallel to the ground
- Push through your front heel to return to the starting position
Common Mistakes:
- Leaning too far forward
- Allowing the front knee to cave inward
- Not lowering deep enough
- Lifting the heel of the front foot
Safety Tips:
- Start with bodyweight before adding dumbbells
- Maintain a straight back throughout the movement
- Keep your front knee aligned with your toes
- Use a sturdy, stable platform for your back foot
Recommended Sets and Repetitions:
- Beginners: 2-3 sets of 8-10 reps per leg
- Intermediate: 3-4 sets of 10-12 reps per leg
- Advanced: 4-5 sets of 12-15 reps per leg
Adjust the volume based on your fitness level and goals. Progress gradually to avoid injury and ensure proper form.
Abs/Core Stability
Training the abs and core is crucial in calisthenics for building core strength, enhancing stability, and improving overall fitness. A strong core supports various movements, from planks to leg raises. It also contributes to better posture and balance.
Integrating abs and core exercises into your routine not only boosts muscle definition but also aids in performing advanced calisthenics moves. Prioritize core training to achieve balanced strength. Optimize your fitness journey with a well-rounded approach.
23. Russian Twists
Russian twists are an excellent exercise for building core strength and improving rotational stability. This movement primarily targets your obliques while also engaging your entire core.
To perform a Russian twist:
- Sit on the floor with your knees bent and feet flat.
- Lean back slightly to engage your core.
- Hold your hands together or a weight in front of you.
- Twist your torso to the right, then to the left, touching the floor or the weight beside you each time.
Benefits:
- Strengthens obliques and core
- Improves rotational stability
- Enhances body control
Common mistakes include using momentum and not fully twisting the torso. To avoid this, focus on slow, controlled movements and keep your back straight throughout the exercise.
If you’re new to Russian twists, start without any weight or with a light weight. Aim for 10 controlled reps on each side before progressing to more advanced variations like adding a heavier weight or performing the exercise with your feet off the ground.
For optimal results, perform 3 sets of 8-12 repetitions on each side, adjusting based on your fitness level.
24. Mountain Climbers
Mountain climbers are a dynamic exercise that builds core strength, enhances cardiovascular fitness, and improves agility. This movement primarily targets your abs, but also engages your shoulders, arms, and legs.
To perform mountain climbers:
- Start in a high plank position with your hands directly under your shoulders.
- Keep your body in a straight line from head to heels.
- Drive your right knee towards your chest.
- Quickly switch legs, bringing your left knee towards your chest while extending your right leg back.
- Continue alternating legs at a fast pace.
Benefits:
- Strengthens abs and core
- Improves cardiovascular endurance
- Enhances agility and coordination
Common mistakes include raising the hips too high and not maintaining a straight line with your body. To avoid this, keep your core engaged and maintain a steady, controlled pace.
If you’re new to mountain climbers, start at a slower pace to ensure proper form. Aim for 20 controlled reps (10 per leg) before increasing your speed and duration.
For optimal results, perform 3 sets of 20-30 seconds, adjusting based on your fitness level.
25. Leg Raise
The leg raise is a cornerstone exercise for building core strength and improving grip endurance. This movement primarily targets your lower abdominals while also engaging your entire core and forearms.
To perform a leg raise:
- Hang from a pull-up bar with an overhand grip
- Keep your arms straight and shoulders engaged
- Lift your legs until they’re parallel to the ground
- Lower them back down with control
Benefits:
- Strengthens lower abs and core
- Improves grip strength
- Enhances body control
Common mistakes include swinging the legs and using momentum. To avoid this, keep your eyes on your toes throughout the movement and focus on slow, controlled repetitions.
If you’re new to leg raises, start with knee raises on parallel bars or floor leg raises. Aim for 10 controlled reps before progressing to more advanced variations like toe-to-bar raises.
For optimal results, perform 3 sets of 8-12 repetitions, adjusting based on your fitness level.
26. Hollow Body Hold
The Hollow Body Hold is a powerful core exercise that builds full-body tension. It’s essential for mastering advanced calisthenics skills like handstands, back levers, and front levers. To perform this exercise correctly, maintain contact between your lower back and the floor throughout the movement.
Begin with the tucked position if you’re new to this exercise. Gradually progress by extending one leg, then both legs as your strength improves. Aim for a 60-second hold in each progression before moving to the next level.
Here’s how to perform the Hollow Body Hold:
- Lie on your back with your arms extended overhead
- Press your lower back into the floor
- Lift your arms, shoulders, and legs off the ground
- Hold this position while maintaining tension throughout your body
For an extra challenge, try adding ankle weights to increase resistance and further strengthen your core.
27. L-Sit
The L-Sit is a challenging exercise that builds core strength, enhances shoulder stability, and improves overall body control. This movement primarily targets your abs, hip flexors, and shoulders.
To perform an L-Sit:
- Sit on the ground with your legs extended in front of you and your hands placed on the ground beside your hips.
- Press into the ground with your hands to lift your body off the floor.
- Keep your legs straight and lift them to form an “L” shape with your body.
- Hold this position for as long as you can while maintaining proper form.
Benefits:
- Strengthens abs, hip flexors, and shoulders
- Enhances core stability
- Improves overall body control and balance
Common mistakes include bending the knees and rounding the shoulders. To avoid this, keep your legs straight and your shoulders engaged throughout the movement.
If you’re new to the L-Sit, start with tuck holds or practice lifting one leg at a time. Aim to hold the position for 10-15 seconds before progressing to longer holds.
For optimal results, perform 3 sets of 10-15 second holds, adjusting based on your fitness level.
28. Dragon Flag: The Legendary Core Challenge
The Dragon Flag is a renowned exercise that showcases exceptional core strength and control. This advanced movement targets your entire midsection, engaging the abs, obliques, and lower back muscles simultaneously.
Benefits of mastering the Dragon Flag include improved core stability, enhanced body awareness, and increased strength for other advanced calisthenics skills. It’s an excellent exercise for athletes and fitness enthusiasts looking to push their limits.
To perform a Dragon Flag:
- Lie on a bench with your head near the end
- Grasp the bench behind your head for support
- Lift your legs and lower back off the bench, keeping your body straight
- Lower your body slowly while maintaining a rigid position
- Touch your lower back to the bench, then raise back up
Common mistakes include arching the back, bending at the hips, or using momentum. Focus on maintaining a straight line from shoulders to toes throughout the movement.
Safety tip: Start with easier progressions like tucked or single-leg variations before attempting the full Dragon Flag. Always warm up properly and listen to your body to avoid injury.
For beginners, aim for 2-3 sets of 3-5 repetitions. As you progress, increase to 3-4 sets of 6-8 reps. Advanced practitioners can challenge themselves with single-arm variations or longer hold times.
29. Planche: The Ultimate Balance Hold
The planche is an advanced calisthenics exercise that builds extraordinary upper body and core strength while enhancing balance and body control. This movement primarily targets your shoulders, chest, and core.
To perform a planche:
- Start in a push-up position with your hands placed slightly wider than shoulder-width apart.
- Lean forward, shifting your weight onto your hands while keeping your arms straight.
- Lift your feet off the ground, aiming to balance your body parallel to the floor.
- Hold this position while maintaining a tight core and straight arms.
Benefits:
- Develops immense shoulder, chest, and core strength
- Enhances balance and body control
- Improves overall upper body muscle definition
Common mistakes include bending the arms and not leaning forward enough. To avoid this, keep your arms straight and focus on shifting your weight forward while engaging your core.
If you’re new to the planche, start with planche leans or tuck planches to build the necessary strength and balance. Aim to hold the position for a few seconds before progressing to longer holds and more advanced variations like the straddle planche or full planche.
For optimal results, practice planche progressions regularly and perform 3 sets of holds, adjusting the duration based on your fitness level.
6 Essential Equipment for Home Calisthenics
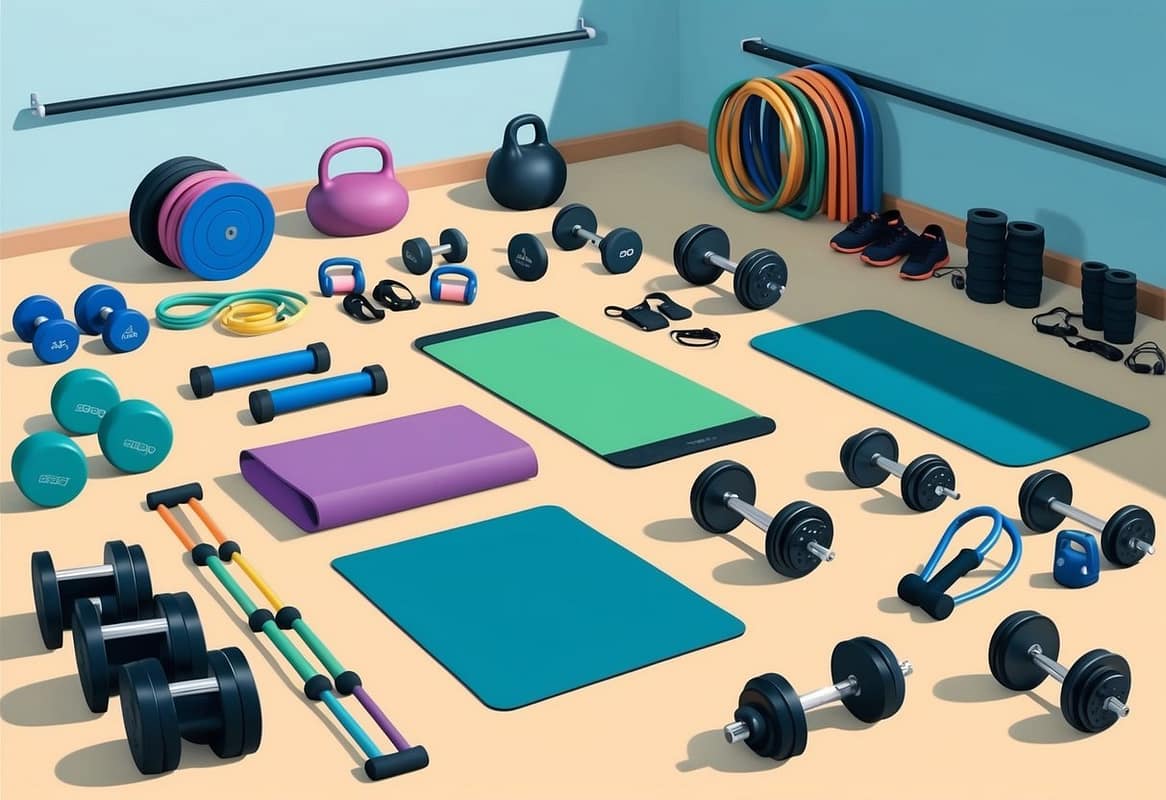
Calisthenics is an effective way to build strength and improve fitness using your own body weight. With the right equipment, you can take your home workouts to the next level. Here are 6 essential pieces of gear to enhance your calisthenics routine and maximize results.
MQRW Home Gym System
Description: A versatile and comprehensive home gym system designed to support a wide range of exercises, including chest presses, leg extensions, and lat pulldowns. It features adjustable resistance settings and a compact, durable design.
Benefits: Allows for full-body workouts targeting all major muscle groups, making it a convenient and efficient alternative to multiple pieces of equipment. The adjustable settings cater to all fitness levels, and its space-saving design is perfect for home use.
Parallettes
Description: Small, portable bars that sit close to the ground, used for exercises like push-ups, L-sits, and planche training.
Benefits: Ideal for developing wrist and shoulder strength while allowing for a greater range of motion. Excellent for enhancing core stability and upper body strength.
Gymnastic Rings
Description: Adjustable rings that can be hung from a pull-up bar or other sturdy structure.
Benefits: Excellent for developing upper body and core strength, as well as improving balance and coordination. Rings add an element of instability that challenges your muscles in new ways.
Resistance Bands
Description: Elastic bands that provide varying levels of resistance, suitable for a wide range of exercises.
Benefits: Useful for warming up, adding resistance to bodyweight exercises, and assisting with pull-ups. They are versatile, portable, and great for improving strength and flexibility.
Pull-Up Bar
Description: A sturdy bar that can be mounted on a door frame, wall, or ceiling, used for pull-ups, chin-ups, and hanging leg raises. Benefits: Essential for building upper body and core strength. It helps improve grip strength and allows for a variety of exercises targeting different muscle groups.
Dip Bars
Description: Parallel bars used for dips, L-sits, and other bodyweight exercises.
Benefits: Great for building upper body strength, particularly in the chest, shoulders, and triceps. They also enhance core stability and can be used for a variety of exercises to target different muscle groups.
Buying Guide
When selecting calisthenics equipment for your home workouts, consider durability and versatility. Look for items made from high-quality materials that can withstand frequent use.
Space efficiency is crucial. Choose equipment that’s compact and easily storable, especially if you have limited room.
Key Features to Consider
- Weight capacity: Ensure the equipment can support your body weight safely
- Adjustability: Options for different skill levels and exercises
- Grip comfort: Non-slip surfaces for secure holds
- Portability: Lightweight design for easy movement
Comparing Options
| Feature | Importance | What to Look For |
|---|---|---|
| Material | High | Steel, heavy-duty plastic |
| Size | Medium | Compact, foldable designs |
| Versatility | High | Multi-exercise functionality |
| Price | Varies | Balance quality with budget |
Consider your fitness goals and current level when choosing equipment. Beginners may start with basic items, while more advanced users might need specialized gear.
Read user reviews and product specifications carefully. This helps you understand real-world performance and potential limitations of the equipment.
Frequently Asked Questions